A chipped bathtub can instantly make your bathroom look worn out and neglected. Fortunately, you don’t need to spend thousands replacing your tub. With a high-quality bathtub repair kit, you can fix chips, cracks, and minor surface damage yourself in just a few hours.
If you’re looking for a reliable DIY solution, the team at Tub Repair Store offers professional-grade products designed to help homeowners restore damaged tubs quickly and affordably.
In this guide, we’ll show you exactly how to repair a chipped bathtub with a repair kit and achieve long-lasting results.
Why You Should Repair a Chipped Bathtub Quickly
Many homeowners assume small bathtub chips are purely cosmetic, but that’s rarely the case.
Over time, chips can lead to:
- Water damage beneath the surface
- Rust formation on metal tubs
- Expanding cracks
- Mold and mildew growth
- More expensive repairs later
Repairing damage early helps protect your bathtub and maintain its appearance.
What You’ll Need
Before you begin, gather the following materials:
- Bathtub repair kit
- Fine-grit sandpaper (400–600 grit)
- Surface cleaner or rubbing alcohol
- Clean cloth
- Painter’s tape
- Disposable gloves
- Applicator tool
For best results, consider using a dedicated chip and crack repair kit designed specifically for bathtub surface repairs.
Step 1: Clean the Damaged Area
Start by thoroughly cleaning the chipped section.
Remove any soap residue, dirt, oils, or loose debris. Use rubbing alcohol or a non-abrasive cleaner to ensure the repair area is completely clean.
Allow the surface to dry fully before moving to the next step.
Step 2: Sand the Chip
Lightly sand the damaged area using fine-grit sandpaper.
This helps smooth rough edges and creates a better surface for the repair material to bond to.
After sanding, wipe away all dust with a clean cloth.
Step 3: Mask the Surrounding Area
Apply painter’s tape around the chip.
This prevents accidental spreading of repair compound and helps create clean, professional-looking edges.
Step 4: Prepare the Repair Compound
Follow the instructions included with your bathtub repair kit.
Some products require mixing two components together, while others come pre-mixed and ready to use.
Mix only the amount you’ll need for the repair.
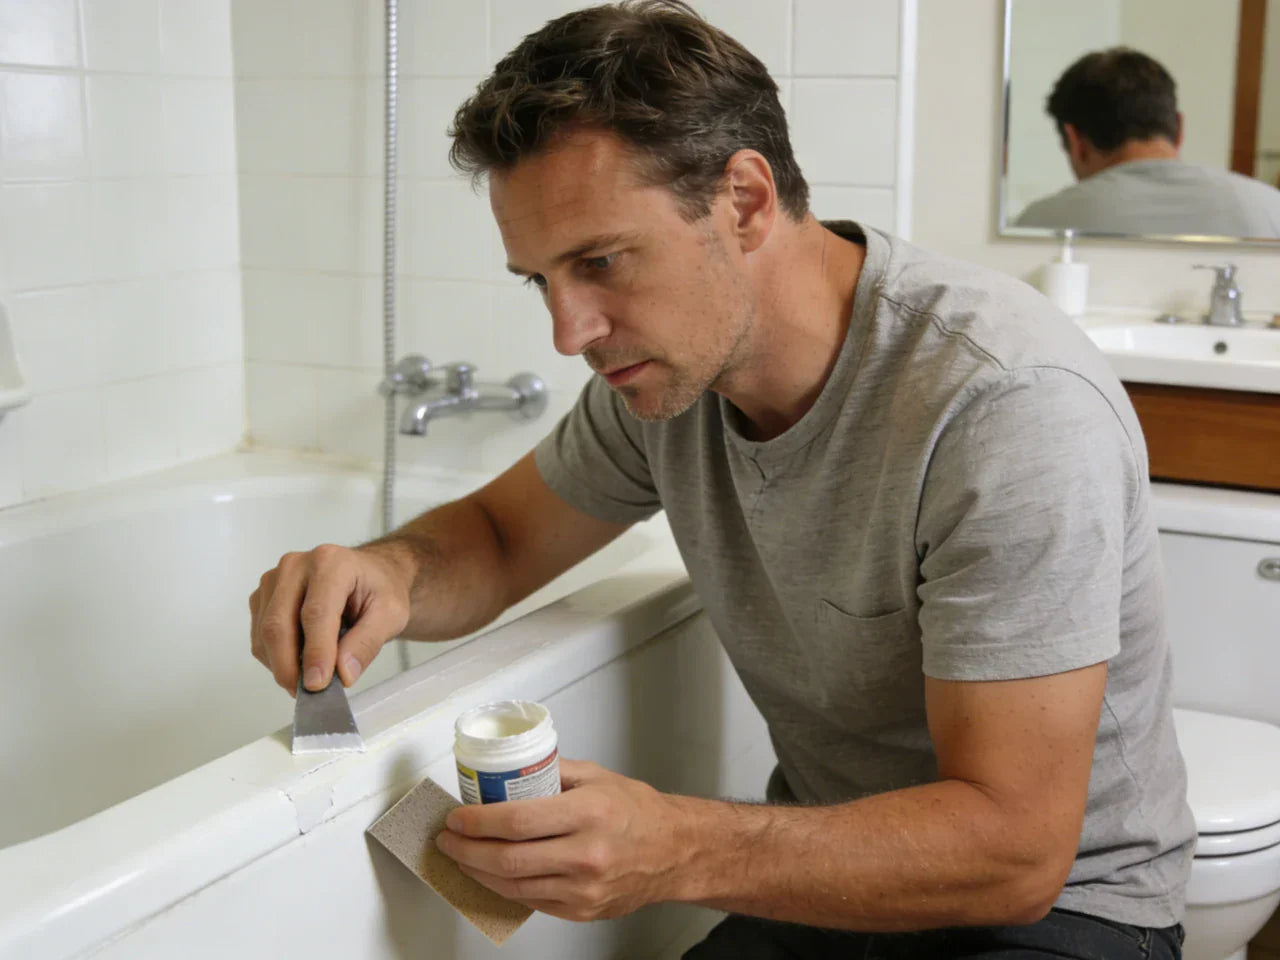
Step 5: Apply the Repair Material
Using the applicator provided, carefully fill the chip with the repair compound.
Apply thin layers until the damaged area is level with the surrounding tub surface.
Avoid overfilling, as excess material may require additional sanding later.
Step 6: Allow the Repair to Cure
Curing time varies depending on the repair kit used.
Avoid touching the repaired area or using the bathtub until the product has fully hardened according to the manufacturer’s instructions.
Patience during this step helps ensure a durable repair.
Step 7: Sand and Finish
Once the repair has cured completely, lightly sand the area until it blends smoothly with the surrounding surface.
Use very fine sandpaper and work gradually.
Many bathtub repair kits also include a finishing polish or topcoat that helps restore the original shine of the tub.
Common Mistakes to Avoid
Skipping Surface Preparation
Poor cleaning and sanding can weaken the bond and reduce the lifespan of the repair.
Applying Too Much Filler
Overfilling often creates uneven surfaces that require additional work to smooth out.
Rushing the Curing Process
Using the bathtub before the repair has fully cured can damage the finish.
Using the Wrong Repair Product
Not all repair kits are designed for bathtub surfaces. Always choose a product specifically made for repairing tub chips and cracks.
How Long Does a Bathtub Repair Last?
When applied correctly, a quality bathtub repair kit can provide long-lasting results.
The lifespan of the repair depends on:
- Proper preparation
- Correct application
- Product quality
- Regular maintenance
Many homeowners enjoy years of use from a properly repaired bathtub.
When Should You Replace Instead of Repair?
A repair kit is ideal for:
- Small chips
- Minor cracks
- Surface scratches
- Cosmetic damage
However, professional evaluation may be necessary if your tub has:
- Large structural cracks
- Severe rust damage
- Multiple damaged areas
- Ongoing leaks
Final Thoughts
Learning how to repair a chipped bathtub with a repair kit is one of the easiest and most cost-effective DIY home improvement projects. With the right tools and proper preparation, you can restore your bathtub’s appearance and prevent minor damage from becoming a major problem.
Whether you’re dealing with a small chip or a developing crack, using a professional-quality repair solution from Tub Repair Store can help you achieve durable, professional-looking results without the cost of replacement.